
This guide offers a detailed walkthrough on installing Google Tag Manager manually on your website, integrating it with WordPress and Shopify, and even how to inject GTM containers effectively, ensuring your site’s tracking capabilities are top-notch.
Whether you’re a digital marketing whiz or just dipping your toes into the vast sea of web analytics, Google Tag Manager (GTM) is a powerhouse tool you can’t afford to overlook. It streamlines the process of managing your website’s tags without having to meddle with the code, making it a breeze to track conversions, site analytics, and more.
If you’ve ever found yourself puzzled about how to get GTM up and running on your website, WordPress, or Shopify store, fret not! We’re about to embark on a detailed journey on how to manually install GTM across various platforms, ensuring your digital presence is equipped with the best in tracking technology.
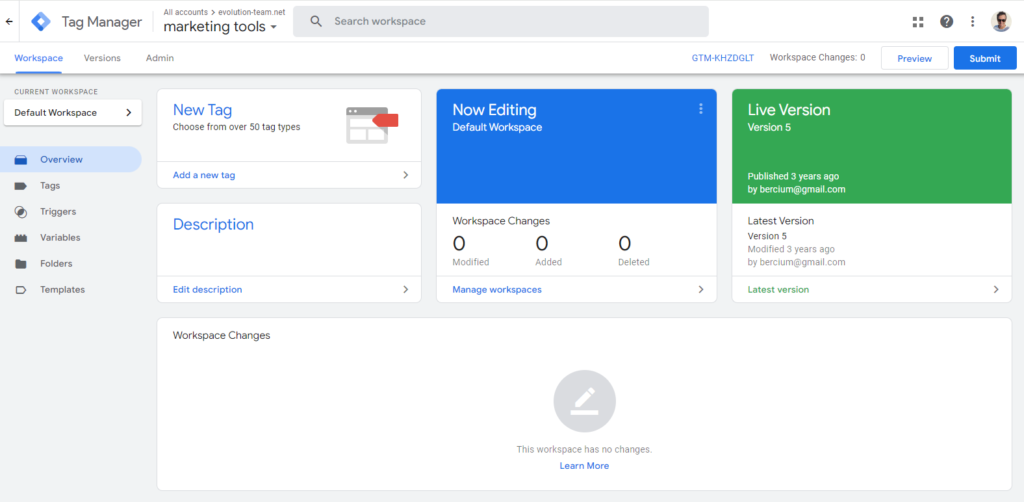
Installation of Google Tag Manager on Your Website
Step 1: Access Your Website’s Files
First, you need to get to the backend of your website where all the files are stored. This can typically be done through FTP (File Transfer Protocol) or via your hosting provider’s control panel, where a file manager tool should be available. Tools like FileZilla for FTP or the cPanel File Manager are commonly used for this purpose.
Step 2: Locate the Correct File
In most cases, you’ll be looking for an “index.html” or “index.php” file for standard websites. This file acts as the entry point to your site, loading first when someone visits your domain. It contains the essential <head> and <body> tags where the GTM code snippets will be placed.
Step 3: Insert GTM Code Snippets
Google Tag Manager provides you with two pieces of code when you set up a new container:
- The <head> snippet: This piece of code should be placed as close to the opening <head> tag as possible. It’s crucial for ensuring GTM loads efficiently.
- The <body> snippet: This code needs to be inserted immediately after the opening <body> tag. It’s designed for browsers where JavaScript might be disabled and ensures GTM can still fire certain tags.
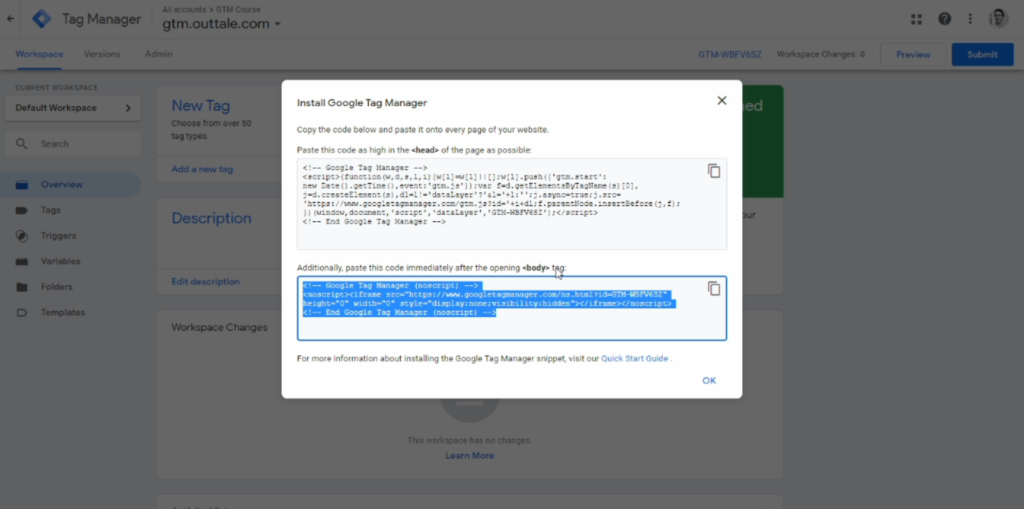
To add these snippets, open the “index” file with a code editor (this can be done within the file manager for most hosting providers).
Paste the <head> snippet at the top of the <head> section and the <body> snippet right after the opening <body> tag.
Step 4: Save Changes and Test
After inserting the code snippets, save your changes. Refresh your website and use tools like Google Tag Assistant to verify that GTM is properly installed. This browser extension will show a GTM icon indicating the tag is present and firing correctly.
Setup Google Tag Manager on WordPress
Option 1: Manual Installation
For those who prefer hands-on control or have custom themes, manual insertion of the GTM code is possible through the theme’s header file.
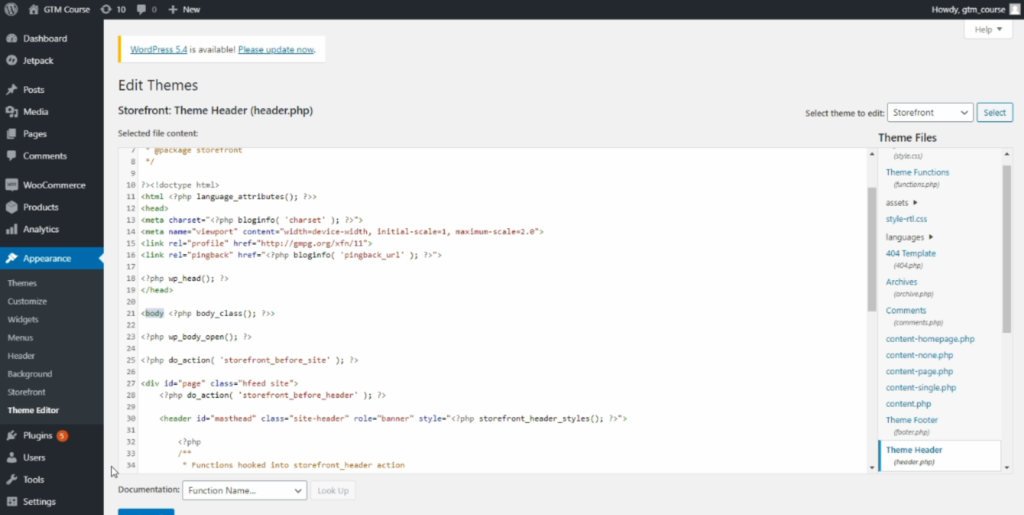
Navigate to Your Theme Editor
In your WordPress dashboard, go to Appearance > Theme Editor. Here, you’ll find access to all the theme’s files.
- Navigate to Your Theme Editor: In your WordPress dashboard, go to Appearance > Theme Editor. Here, you’ll find access to all the theme’s files.
- Edit the Header.php File: Locate the “header.php” file in the list of theme files. This file controls the header section of your WordPress site, including the <head> and the start of the <body> section.
- Insert GTM Code Snippets: Similar to the manual website installation, paste the GTM code snippets into the appropriate places within the “header.php” file. Save your changes.
Option 2: Using a Plugin (Recommended)
For a more straightforward and less technical approach, using a plugin like “Google Tag Manager for WordPress” is advised.
- Install the Plugin: In your WordPress dashboard, go to Plugins > Add New. Search for “Google Tag Manager for WordPress“, install, and activate the plugin.
- Configure the Plugin: Navigate to the plugin settings, where you’ll be prompted to enter your GTM ID (found in your GTM account). This plugin smartly injects the GTM code in the correct spots across your entire site.
- Verify Installation: Use Google Tag Assistant or check your site’s source code to ensure GTM is firing correctly.

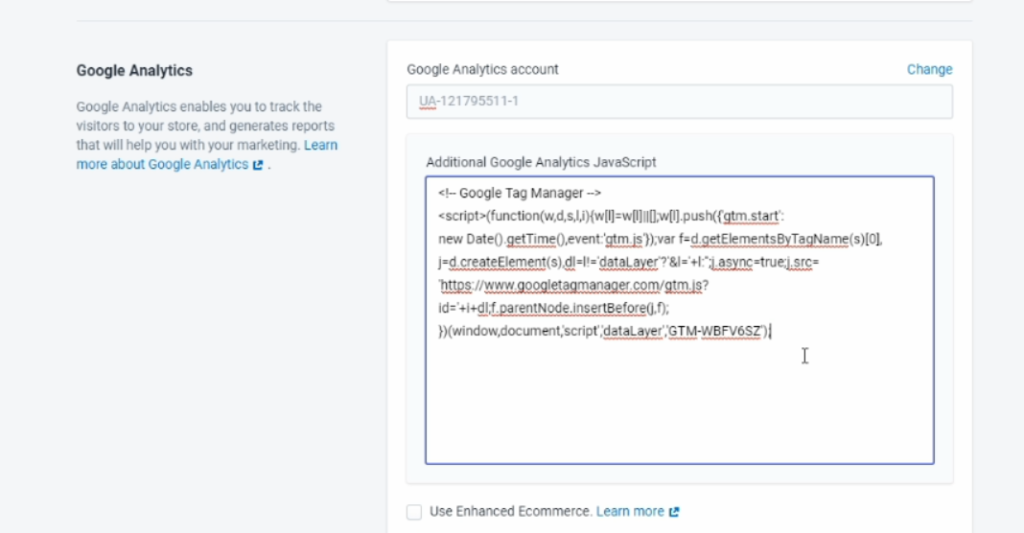
Integrating Google Tag Manager on Shopify
Shopify’s structure requires a slightly different approach, especially if you’re not on a Shopify Plus plan which allows more direct access to the checkout.liquid file.
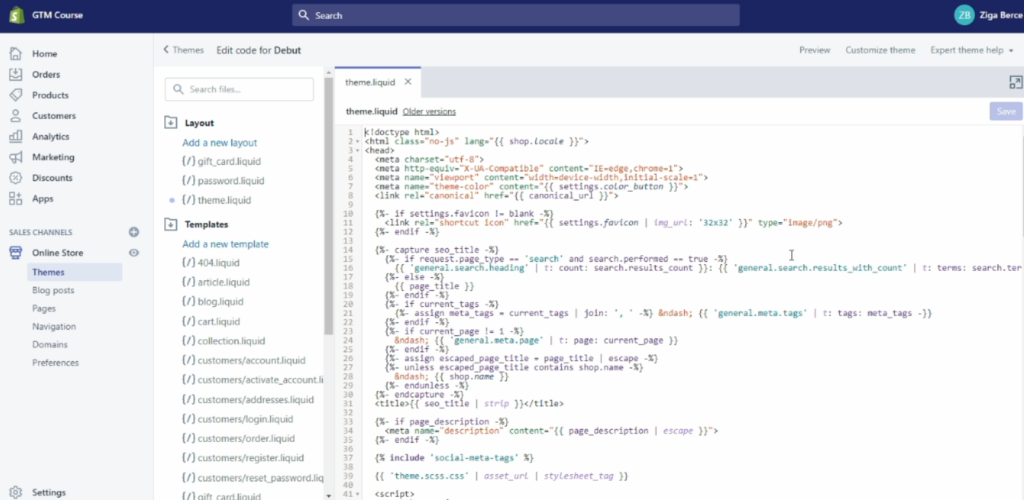
Step 1: Access Theme Files
In your Shopify admin, go to Online Store > Themes. Find your current theme and click on Actions > Edit code.
Step 2: Modify theme.liquid File
In the theme files, locate the “theme.liquid” file. This file acts as the master template for your store. Insert the first GTM code snippet in the <head> section and the second GTM code snippet immediately after the opening <body> tag.
Step 3: Addressing Checkout Tracking
For basic Shopify plans, tracking the checkout process requires a workaround since direct access to “checkout.liquid” is not available.
Implementing GTM on checkout pages involves adding custom JavaScript through Shopify’s Google Analytics feature in the Preferences section. Here, you can enter a modified version of the GTM code designed to work within Shopify’s constraints.
Step 4: Save and Test
After making these changes, save your edits and test the website using Google Tag Assistant to confirm that GTM is active across your store, including the checkout process.
The Most In-Depth
Google Tag Manager Course
With 21 Real Examples For eCommerce Including: FB, GA4, LiN Pixels, Button/Link Clicks, Custom Dimensions and much more.
Setting Up Google Tag Manager on Squarespace
Squarespace simplifies the integration of third-party services, including GTM, through its built-in Code Injection feature. Here’s how to ensure GTM is seamlessly woven into your Squarespace site.
Step 1: Access Code Injection
Log into your Squarespace account and navigate to the backend of your site. From there, head to Settings > Advanced > Code Injection. This area allows you to add custom scripts that will be globally injected into your site, ensuring GTM operates across all pages.
Step 2: Insert GTM Code Snippets
In your GTM account, you’ll find two crucial code snippets. The first snippet, intended for the <head> section of your pages, should be pasted into the “Header” section within Squarespace’s Code Injection area.
Although Squarespace does not provide a direct option to inject code immediately after the opening <body> tag, you can place the second GTM code snippet in the “Footer” section. This approach is not ideal but necessary due to Squarespace’s current limitations.

Step 3: Save and Verify
After saving your changes, your Squarespace site should now be integrated with GTM. Use tools like Google Tag Assistant to confirm the tags are firing correctly. Remember, the unique ID of your GTM container (e.g., GTM-XXXXXX) should be visible in the page’s source code as confirmation of a successful integration.
Injecting Google Tag Manager Container to Any Website
For web developers, marketers, or analysts looking to test GTM implementations without directly editing a site’s code, browser-side injection provides a flexible solution.
Step1: Install the Plugin
The Adswerve plugin (or similar browser extensions) allows you to inject GTM containers into any webpage you visit, enabling you to test and debug GTM configurations in real-time without altering the website’s actual code.
Add the Adswerve plugin to your browser. This tool is designed for Chrome and might have equivalents for other browsers.
Step 2: Inject Your GTM Container
- Open the plugin and navigate to the ‘Insert GTM Container’ option.
- Enter the unique part of your GTM container ID (found in your GTM account) that follows ‘GTM-‘.
- Ensure there are no trailing spaces in your input.
- If the plugin offers the option to match the host, configure it accordingly to ensure the container behaves as if it were truly part of the site.
Step 3: Save and Refresh
Apply the changes, and upon refreshing your browser, the GTM container will be temporarily injected into the webpage. This setup is ideal for testing purposes, ensuring your GTM configurations work as intended without permanently altering the site’s code.

Conclusion
Installing Google Tag Manager doesn’t have to be a daunting task. With the right approach and tools, you can have GTM up and running on your website, WordPress site, or Shopify store in no time.
Whether you choose to go manual, leverage a plugin, or inject containers for testing, GTM’s powerful tracking capabilities are within your reach. Embrace the power of GTM and unlock a world of insights into your website’s performance, user behavior, and more. Happy tagging!