
This guide walks you through the steps of setting up Google Analytics 4 on your website, WordPress site, and Shopify store, ensuring you’re equipped to track and analyze your online traffic like a pro.
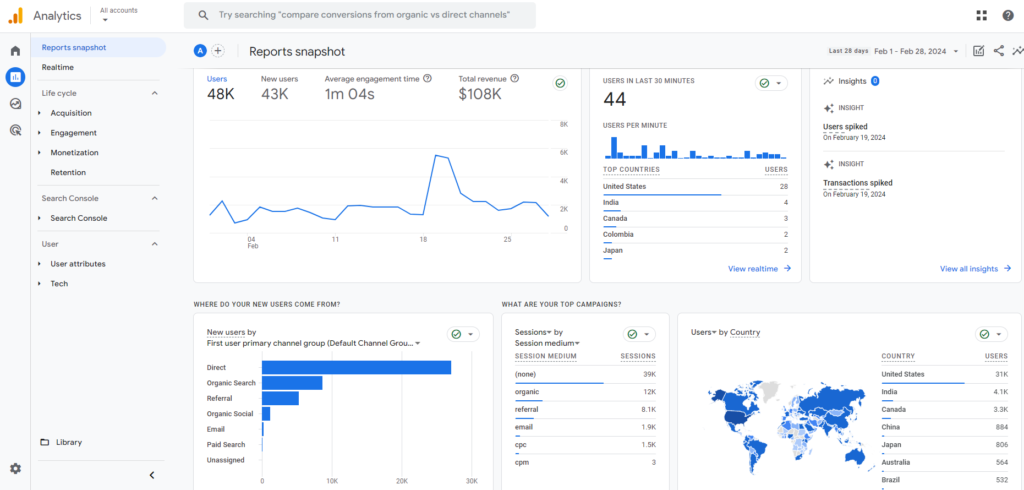
In the digital age, understanding your website’s traffic isn’t just beneficial—it’s essential. With Google Analytics 4 (GA4), you’re equipped with the tools to delve deep into your audience’s behavior, providing you with the insights needed to elevate your online presence. Whether you’re a seasoned webmaster, a WordPress enthusiast, or a Shopify store owner, setting up GA4 can seem daunting. Fear not! We’re here to guide you through the process, step by step, ensuring that you’re ready to harness the power of analytics like never before.
Why Google Analytics 4 – GA4?
Before we get into the nitty-gritty, let’s talk about why GA4 is the analytics tool of choice for many.
Compared to its predecessor, Universal Analytics, GA4 offers a more user-centric approach, allowing for a deeper understanding of the customer journey across platforms and devices. It’s not just about page views; it’s about engagement, interactions, and the overall user experience.
Before we dive in, a heads-up: using Google Tag Manager can make this process smoother, offering enhanced tracking capabilities and flexibility. If you’re keen on diving deeper into that, I’ve got a course that could be just what you need.
But for now, let’s focus on the direct route to GA4 setup.
Setting Up GA4 on Your Website Manually
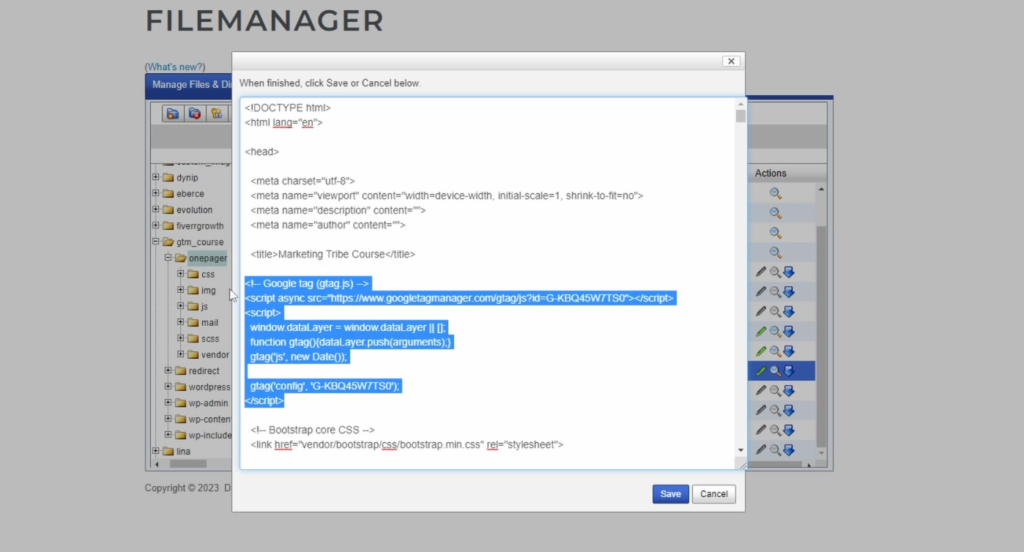
The journey to analytics enlightenment begins with accessing your server files. This is where the magic happens. For most, this means diving into FTP or your hosting provider’s file manager. Once you’re in, locate the heart of your website—the index file or its theme equivalent.
Next, it’s time to grab your GA4 pixel code. Head over to your GA4 account, find ‘Data Streams’, and click on ‘View Tag Instructions’.
Here, Google not only hands you the code on a silver platter but also guides you on where to place it.
The golden rule? Insert it as high as possible within the <head> tag of your site’s HTML.
After embedding the code, save your changes and give your site a quick refresh.
To ensure everything’s in order, you can use tools like Tag Explorer or simply inspect the page source. Remember, patience is a virtue—it may take up to 24 hours for data to appear in your GA4 account.
WordPress Google Analytics 4 Integration
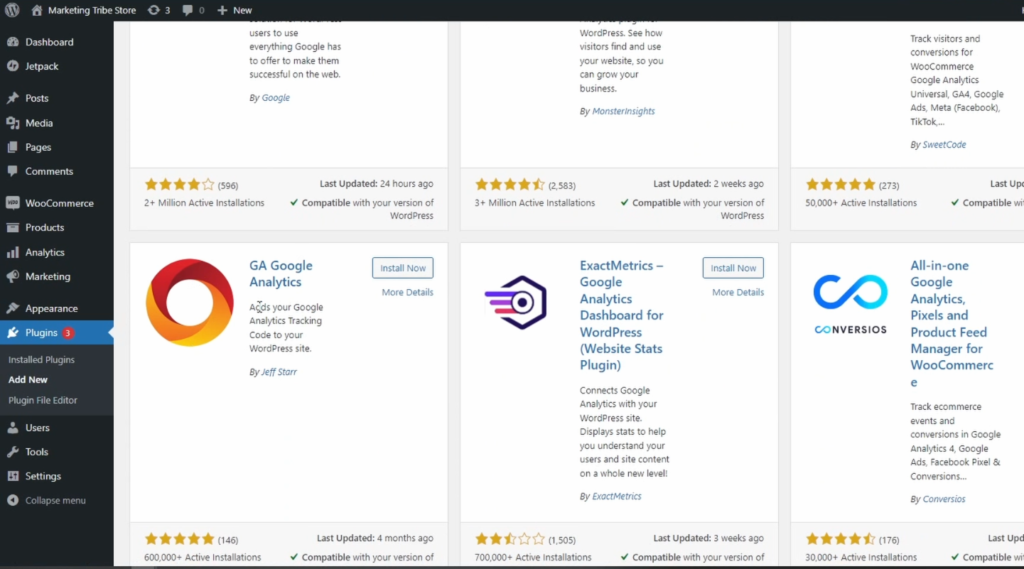
For WordPress users, the world is your oyster when it comes to integration options. If you’re feeling adventurous, you can manually insert the GA4 code into the ‘header’ file located within your theme folder.
However, for those who prefer a smoother sail, plugins like “GA Google Analytics” offer a straightforward solution.
The Most In-Depth
Google Analytics 4 (GA4) Course
Master GA4 custom reports, create custom events & conversions, set it up on Shopify, WordPress, and much more.
Installing the plugin is a breeze. Navigate to ‘Add New’ under plugins in your WordPress admin section, search for “GA Google Analytics“, and install the one by Jeff Starr.
Once activated, hop into the settings, where you’ll paste your GA4 measurement ID, and voilà, you’re all set!
This plugin not only simplifies the setup process but also opens up a world of customization options for those looking to tweak their tracking configurations.
Shopify Google Analytics 4 Setup
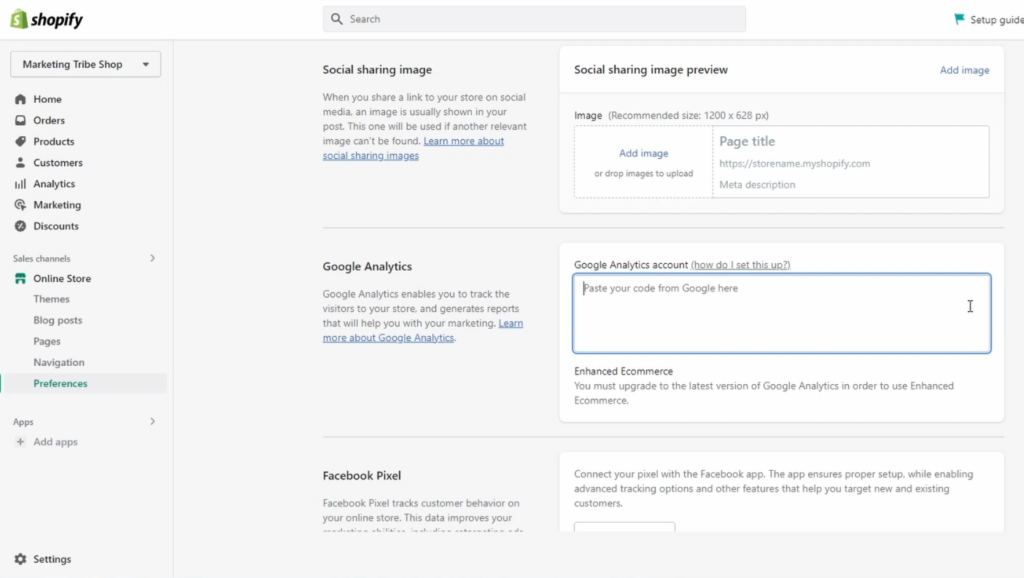
Shopify store owners, fear not—you too can enjoy the benefits of GA4 with ease. From the simplicity of connecting GA4 through online store preferences to the hands-on approach of editing theme files or employing a unique script, there’s a method to suit every level of expertise.
The plug-and-play method involves installing the free Google channel app from the Shopify app store, linking your Google account, and connecting your GA4 analytics property.
For the DIYers, adding the GA4 code to the “theme.liquid” file offers a more custom approach.
Alternatively, using the provided script enables GA4 tracking across all pages, including the checkout process, ensuring no interaction goes unnoticed.
Diving Deeper
For those eager to explore further, resources like the GA Google Analytics WordPress Plugin and the GA4 For Shopify Script are invaluable. Whether you’re looking to enhance your tracking capabilities or streamline your analytics setup, these tools are your allies in navigating the digital analytics landscape.
As we wrap up this guide, remember that the journey to analytics mastery is ongoing. Stay curious, keep experimenting, and let the data lead the way to success. Here’s to your analytics journey—may it be insightful, rewarding, and full of discovery!
Conclusion
Setting up GA4 on your website, WordPress site, or Shopify store is more than just a task—it’s a step toward understanding your audience on a deeper level. By tracking user interactions and engagement, you’re equipped to make data-driven decisions that enhance your site’s performance and, ultimately, your business’s success.
Remember, the digital landscape is ever-evolving, and staying ahead means leveraging the right tools. GA4 is more than just an analytics platform; it’s your gateway to a data-driven understanding of your audience’s journey. Dive in, explore, and let the insights guide you to new heights.